Friday, 27 September 2013

"Music to Inspire" Corner: A Scarlet Cord


"...Bind this line of scarlet cord in the window..." (Joshua 2: 18 NKJV- my emphasis). For "...you were not redeemed with corruptible things, like silver or gold...but with the precious blood of Christ, as of a lamb without blemish or spot." (I Peter 1:18-19 NKJV- my emphasis)
Recently, I 'stumbled' across a lovely Christian band of four lovely siblings who sing amazing Gospel and Bluegrass music: 'Southern Raised Bluegrass' band!
via Google Images
I really fell in love with them and their music! The love and grace of God truly shines from their faces and heard in their songs. They truly are inspiring. I would like to share two of their songs in this "Music to Inspire" post. Both of these were a great blessing to me and I pray they bless you, too.

*  *  *  *  *  *  *  *  *  *  *  *  *  *
via Google Images

The first song is called, "Scarlet Cord". It's a beautiful, beautiful song that tells of the salvation of the harlot Rahab who escaped the destruction of the city of Jericho, was delivered from her past sinful life, became part of the people of God, and even an honoured ancestor of the Lord Jesus, the Messiah! She had hid the Israelite spies from the Jericho authorities and was told of the way to escape the destruction of the city: by putting a scarlet cord in her window! With this cord, she and her house were saved that day (see Joshua 2:1-24; 6:21-25; Matthew 1:5; and Hebrews 11:31). This scarlet cord stands as a beautiful picture of our salvation in Christ's Blood - 'a scarlet cord for me.' Beautiful!

Scarlet Cord


http://www.youtube.com/watch?v=Wvvs2tk0RPU

In Jericho, a woman weeps
Her heart consumed with fear
The city soon would be destroyed
She knew her end was near.

She thought about the things she'd done
And the way she lived her life
Would God have mercy on her soul?
She couldn't reason why.

Then the messengers told of a way
To escape what she deserved
A thread of scarlet in the window
And her life would be preserved.

Refrain:
The Scarlet Cord brought salvation
To Rahab's house that day
And it would stand as a picture
Of the price our Lord would pay.

If you're looking for a way out
Of the Judgement that awaits
The Scarlet Cord of Jesus Blood
Is the only way.

I tried my best but could not sleep
By doubt and fear oppressed
Death could come at any time
But after that what next?

I thought about the things I've done
And the way I lived my life
Would God have mercy on my soul?
I could not reason why.

But God's Word told me of the One
Who died on Calvary
Jesus shed His precious Blood
It's a Scarlet Cord for me.

Refrain:
The Scarlet Cord brought salvation
To Rahab's house that day
And it would stand as a picture
Of the price our Lord would pay.

If you're looking for a way out
Of the Judgement that awaits
The Scarlet Cord of Jesus Blood
Is the only way. 

If you're looking for a way out 
Of the Judgement that awaits 
Oooo....
The Scarlet Cord of Jesus Blood
It's still the only way.

*  *  *  *  *  *  *  *  *  *  *  *  *  *  *  *  *  *  *  *  *

The second song is a beautiful a capella performance of the dear old hymn, "I Need Thee Every Hour".


I Need Thee Every Hour
by 
Annie S. Hawks and Robert Lowry


http://www.youtube.com/watch?v=UofNlKmq4UE

  1. I need Thee every hour, most gracious Lord;
    No tender voice like Thine can peace afford.
    • Refrain:
      I need Thee, oh, I need Thee;
      Every hour I need Thee;
      Oh, bless me now, my Savior,
      I come to Thee.
  2. I need Thee every hour, stay Thou nearby;
    Temptations lose their pow’r when Thou art nigh.
  3. I need Thee every hour, in joy or pain;
    Come quickly and abide, or life is vain.
  4. I need Thee every hour; teach me Thy will;
    And Thy rich promises in me fulfill.
  5. I need Thee every hour, most Holy One;
    Oh, make me Thine indeed, Thou blessed Son.

    *  *  *  *  *  *  *  *  *  *  *  *  *  *  *  *  *  *  *  *  *  *  *


Sunday, 22 September 2013

Truly Scrumptious...Chicken Kiev!


Earlier this weekend I fancied trying out a new way of cooking and eating chicken! After a little looking around in our stuffed cookbook shelf, internet recipe sites and...uhm..yes, Pinterest..., I decided to try 'Chicken Kiev'. Here is how it turned out and the process by which it magically ended unto this plate in such fashion!!

curtsey photo:
Joy C.

Ingredients:
(Disclaimer: This is my adaption from different recipes for making 'Chicken Kiev') 

Main Ingredient:
2 kg Chicken thigh fillets 
(This should serve approximately up to 12 people with perhaps some left overs)
Note: In most 'Chicken Kiev' recipes, Chicken breasts are used instead. I prefer thigh fillet for their tenderness

The Filling:
2 Chopped shallots 
A handful of Fresh parsley
2 Silver beets or Spinach
2 Cloves of garlic, minced
200g butter
Salt to taste

Crumbing and Frying:
4-5 Eggs, lightly beaten (or as many as needed for crumbing)
1-3 cups of milk or water (as much as needed)
Plain flour (I used wholemeal plain flour)
Fine dry breadcrumbs (I used brown rice breadcrumbs)
Parmesan cheese (grated)
Salt and pepper to taste
Oil and butter for frying

curtsey photo:
Joy C.

Directions:

Filling:
1.  In a small bowl, combine and blend the butter with the shallots, parsley, and garlic – create sort of a paste; set aside. Remember to add salt and pepper to taste.
2.     Keep mixture cool in the fridge.

Crumbing Preparation:
3.     In a shallow bowl stir together egg and water/milk; set aside.
4.     Place flour in another shallow bowl; set aside.
5.     Mix breadcrumbs and grated Parmesan cheese and place in a third shallow bowl; set aside.
  
Chicken Preparation:
6.     Place chicken thigh fillets between 2 pieces of plastic wrap and using the flat side of a meat mallet pound chicken lightly into a rectangle or use your hands to flatten.
7.     Remove plastic wrap and then sprinkle with salt and pepper.
8.     Place one-fourth of the butter filling mixture/paste onto the chicken.
9.     Fold in sides; roll up. If really needed fasten openings with a toothpick.
10. Repeat with remaining chicken

Crumbing and Frying:
11. Coat chicken rolls with flour (season flour).
12. Dip in egg and milk mixture.
13. Coat with breadcrumbs and Parmesan cheese mixture.
14. Coat with flour again.
15. Dip in egg and milk mixture again.
16. Coat with additional breadcrumbs and cheese.
17. Make sure to coat ends well to seal in the butter.
18. Place coated chicken in rectangular baking dish, cover and chill for 1 to 24 hours. This is really important. It helps prevent the stuffing oozing out from chicken roll during frying.
19. In large frying pan, melt some butter over medium-high heat; add oil.
20. Add chilled chicken rolls. Cook about 5 minutes or until golden brown, turning to brown all sides.
21. Place rolls in baking dish. Bake, uncovered, until chicken is no longer pink.
22. Spoon any dripping over rolls.
23. Now you can serve with steamed vegetables, and any sauces you prefer...such as white or mushroom sauce.

So, this is how it all turned out as you see in the photos! I must say I enjoyed making it and...eating it, too, I must add!!!  


Note: This recipe was based on How to Make Chicken Kiev and Chicken Kiev.


Saturday, 14 September 2013

Dollhouse Decorating (Part 1)


After a much-needed and refreshing 3 month term-break from Uni, I'm back to a full study schedule of readings, research, books, assignments, computer screens, files,...and, well, you get the idea! It is exciting, but challenging to be sure.

During my break I enjoyed doing many things I had wanted to do for a very long time. For example, one of those really special things I managed to do was to hone my singing skills and techniques (but more on that in some later post). One other thing I really enjoyed doing, was decorate my little sister's dollhouse! Since I was a little girl, I always dreamed of doing this. I love decorating and interior design. This was a great opportunity to try it on a nice, very small scale. I was also particularly inspired by Emma J.'s work of customising and decorating playmobil houses and Cherrybrook Village: A Sylvanian Families Fan Site


I thought I'd like to show you something of my humble attempts to decorate my sister's dollhouse! Perhaps, it can inspire you if you've got a similar hobby. 


Here is the dollhouse...A Sylvanian House on a Hill... It is quite suitable for playmobil figures, too.

The Dollhouse!
Here is how it all turned out...
The back-side of the house...

The side-part of the house...
The hardest to work on were both the attic and the winding staircase! 
The attic children's bedroom...
A closer look at the attic...
Carpeting the winding staircase was a real challenge...
To give the impression of shinny tiles, I covered the wallpaper and flooring of both the kitchen and bathroom with cello-tape. 

The Kitchen!
The Bathroom!
*******************
Here is how I went about decorating this nice little dollhouse!

Dollhouse Tutorial (Part 1)
Step 1 - Tools I used: 

  • Rulers
  • Pencils and eraser
  • Scissors 
  • Cello-tape (normal sticky tape)
  • A Cutter
  • A cutting board (or quilting board)
  • Paper (for creating templates)
  • Double-sided, Acid-Free sticky tape (available from Craft/Art stores or hardware store)
  • Wet Sponge and towel
  • A colour printer 
Step 2: 
Using a damp sponge, I made sure the surface of the walls was clean. Then, I made sure it was dry. 

Step 3: 
Then, using some paper, I made a template of all the walls of the room. I needed to make it as accurate as possible. This way I wouldn't run into problems and waste the real wallpaper.

Step 4: 
Making a template of the windows was always trickiest thing. (See image 4 to see how I did it!)
Step 5: 
For wallpaper, I browsed the internet for dollhouse decorating and miniature websites and found many printable wallpaper to use - all for free! 
Here are some links: 
My Obsession (Gives more links)

Choosing the right wallpaper was also a challenging step. I had to always take into consideration the dollhouse furniture, the style, the colours, and the historical era I wanted the house to be customised into.
Whenever I found a suitable wallpaper, I downloaded it (or 'Saved as') to my computer. Using a photo-editing programme (such as Photoshop or a free online one - Picmonkey), I enhanced, edited and 'mix-'n'-matched' various wallpapers and borders to create my own new styles.
Finally, with a bit of trial and error, I managed to find the print settings and scale required for printing the wallpaper. 

Steps 6, 7, & 8: 
The next step after finding and printing the wallpaper, was cutting it out (using the templates made in steps 3 and 4).
Then, I placed double-sided sticky tape on the back of the cut-out wallpaper. 
Steps 9-12: 
The next step was to remove the covering from the sticky-tape on the back of the wallpaper one section at a time and stick it to the wall, carefully, one bit a time. This is very important! 
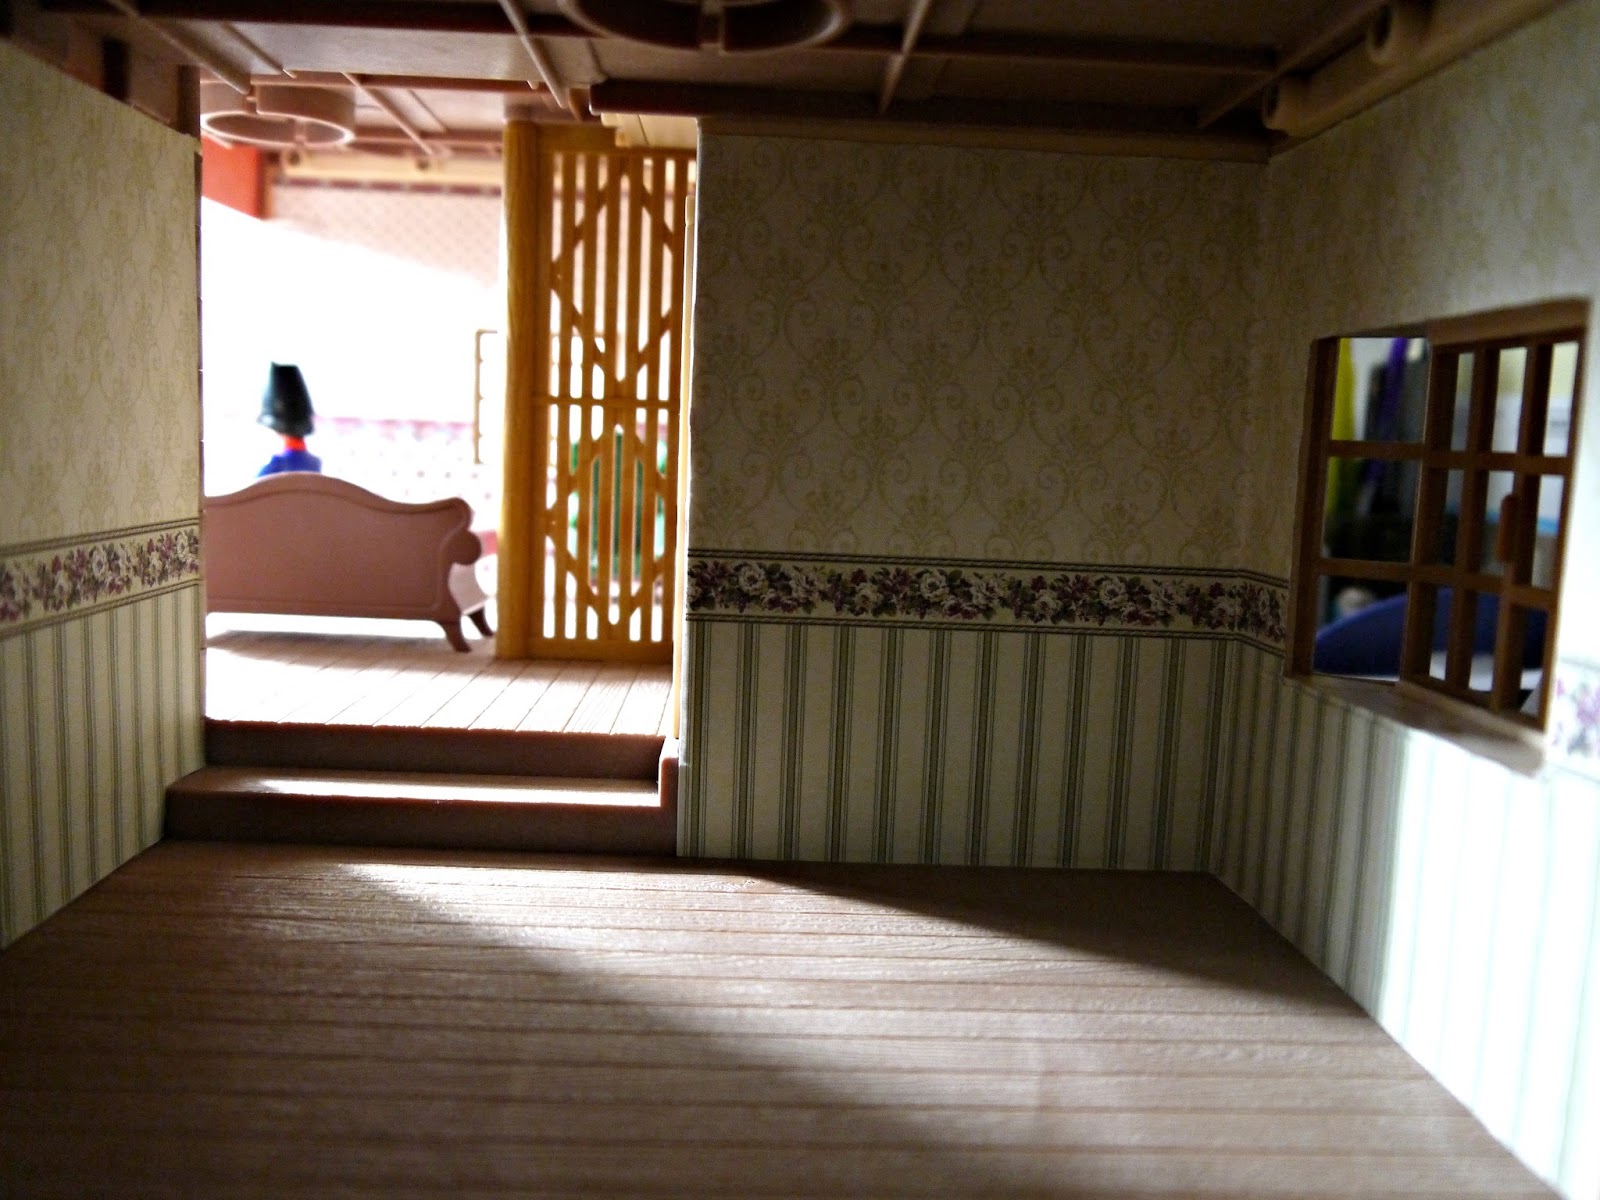
I did this with all the walls...and here is the final result! What do you think?
Using the same steps, I finished the walls of all the other rooms and used the same steps for putting carpeting on the floors...using felt and the double-sided sticky tape.

The last step remaining is to put suitable curtains and put back all the furniture. So, keep a look out for another post from me when I finally get to finish it. Gracie, my sister, is just so excited with this project...and I must admit...me, too! 


Related Posts Plugin for WordPress, Blogger...